
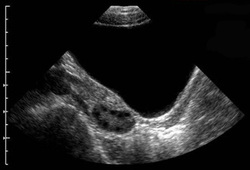
Ovaries are tiny, surprisingly mobile and often hidden by bowel, so no wonder they test our skills and patience!
1. Half-way empty the bladder.
Visually you can identify a too-full bladder by its rounded appearance and depth on screen exceeding 10 cm. That’s awfully far for your ultrasound beam to penetrate and those little ovaries will be squished into some tight corner of the pelvis. Off to the bathroom with her! Click here for tips on positively persuading her to partially empty!
Have your patient empty about halfway. A halfway (ish) full bladder gives you the belly flexibility to push a bit while you search and allows space in the pelvis for the ovary to return to view. Plus your patient will be so much happier and relaxed that you’ll both enjoy the scan much more.
2. Follow the ligaments.
Remember: the ovaries will never be further out laterally than the pelvic muscles, so be familiar with the striated appearance of muscle on ultrasound. And ovaries can often be surrounded by vessels so a scan with color Doppler on can sometimes outline the ovary nicely.
3. Thorough attentive sweeps.
And be attentive for the ovary sign. That is what I call the little “blip” you see when you sweep past something small, oval and discrete amongst all the windy vessels and shadowy bowels in the pelvis.
4. Check the Greater Pelvis.
Important: If your patient has any type of pain in the LLQ or RLQ always thoroughly assess those areas. It could be a sign that an ovary is up there (with a possible pathology that is causing the pain).
5. Had any pelvic surgery?
These days the scars from laparoscopic surgeries are so tiny that you’ll never see them, so clear questioning is best.
Although complete removal of an ovary is rare, it does happen with some complex cyst or dermoid removals. You just don’t know, so always ask. That way you won’t be wasting your time searching for something that may not even be there.
6. Do an EV.
Once you’re all set up, start again in the pelvic midline and sweep your way out laterally from the uterus until you see a glimpse of the ovary. The real key to EV scans is to use firm pressure to move the bowel gas out of the way, but to apply it very slowly and evenly. No jerking around in there, it’s a sensitive place. Always keep your transducer movements slow and gentle.
You can also have the patient help you out a bit by using both her hands to push slowly and firmly down on her pelvis to help push the ovary into your field of view and move aside some of the bowel gas. Some patients actually like being able to help out a bit.
Another little trick: When assessing the right side of the pelvis with EV, reverse the transducer orientation (turn it around in your hand and hold it backwards) and push the Reverse Image button. When you reverse both the transducer and the image you get the correctly aligned orientation on the screen. This allows you to take advantage of the small angle of the transducer head to see further into the right adnexa. (This takes a bit of practice but is very useful.)
Happy Scanning!
Do you have any other Ovary-Hunting-Strategies that you use? Share them in the comments below, I’d love to hear them!
Comments
One response to “Six Effective Ovary-Hunting-Strategies!”
The information in your article is incredible. Very good article. It is very well written. I am looking forward for your more posts in the future.